
Everyone loves tips and tricks that make your life easier. In the CRM world, this tends to revolve around automation and workflow. This means telling the system to behave intelligently and trigger actions when specified outcomes are met. Effectively, you are using your CRM to gather data that can be useful to many members of your team. Automation is a great way to work with that data for the benefit of different departments. In particular, leveraging CRM Automations can significantly enhance these processes.
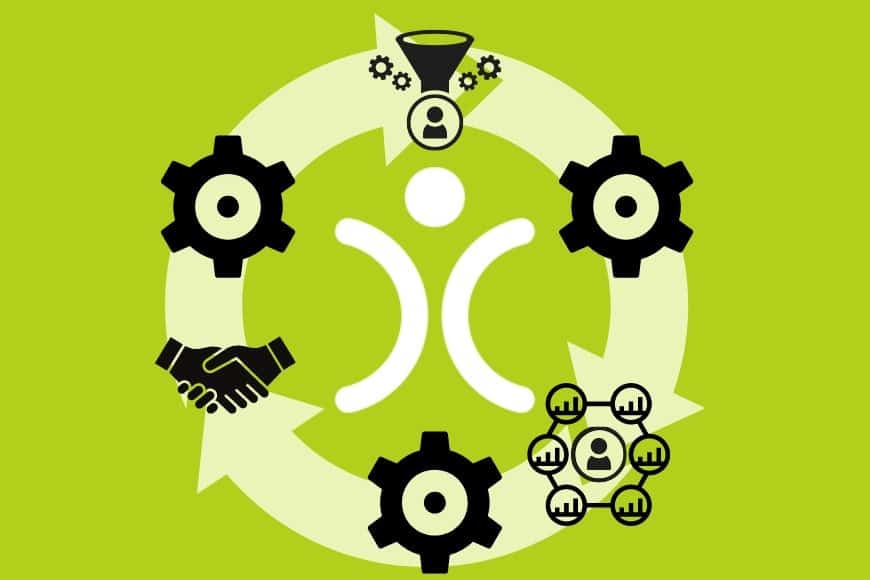
And so in this blog post, we are going to show you an astounding 20 ways in which OpenCRM can help simplify the lives of your salespeople using automation. To illustrate this, let’s walk through a standard sales process starting from enquiry, taking you right through to a successful closed Opportunity.
Utilising CRM Automations allows teams to streamline their workflows, ensuring that no lead falls through the cracks.
When an Enquiry Lands
Most businesses with a web presence are likely to use a Contact Us form somewhere or other. These can be considered great Leads as the person filling it in has already expressed an interest in your product or service. Typically, you may get notified of the new Lead via email or in a report form. But it also feels logical to automate the capture of this information in your CRM. This is easy if your form is an embedded Jotform on your website, but even if you are using a different form package, you can likely use Zapier to pull that data into your CRM.
Automate the capture of enquiry form data straight into your CRM.
There are a couple of things to consider. Firstly, you want to make the form as simple as possible for the Lead to complete, maybe just capturing a name and an email address. But in the back end, you need to add some more information. You will want to add in the Lead Source, so you can easily report on this. In addition, you want to assign the inbound Leads to your salespeople. Depending on the nature of the form, you might implement an auto-assign rule to give the Lead to the right person.
Implement an auto-assign rule to route inbound Leads to the right person.
The Auto Email
Once the Lead has landed, even before the salesperson gets involved, you can trigger further automation. Wouldn’t it be great to automatically send an email to the lead, using merge variables in the mail to let them know who will be contacting them, and with a link embedded in the email to take them to the salesperson’s calendar. An Email Plan allows you to schedule one (or more) emails, and you can trigger an email plan either manually or conditionally if you set the relevant criteria.
Automatically send an email to a new lead the moment they land.
Use merge variables so that email reads as personal, not generic.
Embed a calendar link right in that first email.
By tracking click-throughs, you don’t need to wait for the person to actually book into the diary – use automation to generate an activity letting you know they have clicked on the link. You could even pin a report to your dashboard that shows how many clickthroughs you have had per month, and compare this against the number of bookings made to see if you are getting good results.
Track click-throughs automatically to see engagement without waiting on a booking.
Pin a click-through report to your dashboard to spot trends at a glance.
Warming Up the Lead
When the Lead drops into your CRM, they are still something of an unknown quantity. But that initial click on the calendar link can serve as confirmation of their interest. Time to warm up the Lead. You can use workflow on the Activity created in the step above to update the Lead’s Rating. Let’s move them from “Cold” to “Hot”.
Use workflow to automatically update a Lead’s Rating as they warm up.
If we take a step back into the CRM world and look at the list of Leads in your system. You can use custom views to break that complete list into relevant chunks and useful subsets of data.
Use custom views to automatically surface Leads at a given rating.
One such view would be to see all Leads with a “Hot” rating. When setting up the View, in this instance, you would use a criterion to only include Leads with the desired rating. Once they reach that rating, they will automatically be included in the view.
Hopefully, you can see how your salespeople are assisted with back-end automation every step of the way.
One Follow-Up
On the day of the initial meeting, there will often be a follow-up meeting. Using the follow-up section on Activities, a couple of things happen automatically. The User and Lead details are pulled through, and, crucially, so are the details of the prior meeting, with a date and timestamp. When the follow-up activity drops onto your radar, you have all the background information under your nose.
Use the follow-up section on Activities to auto-pull prior meeting details.

Do we have what it takes?
We don’t restrict which features you have access to in OpenCRM based on how many users you have. You get everything right out of the box. Click to find out if we’ve got the features you need.
Find out more →Lead Conversion
Having done all your assessments, it is time to take things to the next level – convert the Lead and bring it into your sales pipeline.
There are a few options on the Lead Conversion screen. You can choose whether to create a new Contact, Company and Opportunity record – any combination of those three. Here you can also find a couple of automation options. Firstly, you can enable a duplicate check which compares the Company against data already in the system. If it finds a match, it will link the Opportunity and Company to that existing record. Otherwise, it creates a new one.
Enable a duplicate check on conversion to avoid creating repeat Company records.
Secondly, among the Opportunity configuration options, you can set an Action Plan.
Set an Action Plan to automate a series of Activities on the new Opportunity.
As with the Email Plan I mentioned earlier, an Action Plan gives you the ability to automate a single or a series of Activities relating to another record – in this case, an Opportunity. Should the circumstances change, you can also cancel an Action Plan that has already been embarked upon.
Working Your Opportunity
The tools you use to manage your Opportunities are the same as those you had in the Lead phase. You can record Activities (Calls, Meetings, Tasks) against the Opportunity and send Emails directly from the record. If you managed the progress of a Lead using the Rating field (e.g. Cold, Warm, Hot), here you drive the Opportunity through the Sales Stages.
There is some inherent automation built into Sales Stages. As you cycle through the Sales Stages, that automatically updates the Probability percentage, which in turn adjusts the weighted amount.
Let Sales Stages automatically update the Probability percentage and weighted amount.
Still thinking about the Sales Stage, there is also a way of getting that to update without any manual intervention. Let’s imagine you are at the Meeting Stage. You have an Activity scheduled for that meeting. When you mark that Activity as “Done”, you could use that to trigger a workflow to automatically set the Sales Stage to “Decision”, as well as generate the next Activity.
Trigger a workflow to auto-advance the Sales Stage when an Activity is marked Done.
When Things Don’t Go As Planned
OK, it’s true that life doesn’t always go according to plan, and that is a factor in sales life too. When it comes to Opportunities, you will win some and lose others. Lost Opportunities do offer the chance to analyse and see what went wrong. Did you pitch too high for example? Or could you not meet the customer’s timescales? If you add a conditional field which appears when the Sales Stage is “Closed Lost”, you could capture (and report on) the reasons for when things didn’t work out.
Add a conditional field on “Closed Lost” to capture and report on the reasons.
Smiles All Round
Hopefully, for each one that falls by the wayside, you can also rack up some positive outcomes and set plenty of Opportunities to “Closed Won”. This can be a trigger for automation to help you deliver the best solution possible without letting anything slip through the cracks. Up until now, if this were a new customer, they would likely have had a status of “Prospect”. Using workflow, you could use the Closed Won status as the trigger to update the linked Company record and set the Status to “Customer”.
Use Closed Won as a trigger to update the linked Company’s status to “Customer”.
Gather Feedback
Whether the outcome of your Opportunity was positive or negative, there will always be room for improvement. One great way of finding out how you can do that is by getting customer feedback. That way you find out what the customer really thinks, and not just what you hope they think. You can use automation here, to fire out an email with a linked questionnaire every time an Opportunity is closed. I mentioned earlier how you can map additional details into an online form, to populate hidden fields. In this example, you could map the ID of the contact, which means that the responses get linked straight back to the right contact.
Auto-send a feedback questionnaire every time an Opportunity closes.
Setting the Wheels in Motion
A Closed Won Opportunity is generally not just the property of the successful salesperson. Other people, for example, the accounting department, will need to know so they can start setting up an account for the client. You could set up an automation to send a notification to the accounts team. Once again, minimising the scope for human error, preventing things from falling through the cracks.
Automatically notify accounts the moment an Opportunity is won.
The word “Closed” in an Opportunity is like a red herring. Whilst a Closed (won) Opportunity might see the end of a salesperson’s involvement, it is generally the start of the customer’s lifetime journey with you. At this stage, you might start working on deliverables, and so you may want to automate the creation of a Project to track the work you’re doing for the customer.
Automate Project creation the moment an Opportunity is Closed Won.
Review and Refine
In today’s post we have looked at automation for your sales pipeline – from new enquiry to closed Opportunity, building on the process outlined in how CRM works in a small business. The last thing to do is to set up some Reports, to get statistics to back up your anecdotal analysis. One typically useful report is to compare converted Leads with Closed Opportunities. This allows you to see how successful your sales process is. Whilst you can set up Reports to run manually whenever you want to see them (or view on your Dashboard), you can also automate the Report to be emailed to yourself and/or other Users at useful intervals, for example on the first day of every month. These are statistics you need, so why not have them delivered to you without manual intervention?
Automate reports to land in your inbox at useful, recurring intervals.
And there you have it – 20 automations to help your sales team. We know that everyone works differently, so take a look and see which of these are relevant to you, and where other automation may better suit your needs.

Ready to automate your sales pipeline?
See how OpenCRM can take the manual work out of every stage.
Start your free trial